How I became a novelist in twelve (easy) steps
There are steps for everything these days, so I reverse-engineered what I did to become a novelist and put the process into 12 steps. The steps were easy sometimes, and other times, they caused some tears. The end result was worth all the effort.
Step 1: I read a lot
Without reading, what’s the point of writing? Reading everything I could get my hands on when I was a kid developed my love of reading and also made me think about some things I would like to read that were not available.
I didn’t just read fiction. I read about the art of writing to learn everything I could, and I also took classes, eventually earning a degree in Creative writing as I learned how to write.

Step 2: I had ideas for characters and plots
It was during childhood daydreaming sessions about stories I wanted to read that Hope, Lydia, Taylor, Noelle, Caroline, Charlotte, and Kincaid began their stories. As of 2024, Noelle’s story is in progress. Hope’s story will come afterward.

Step 3: I wrote (multiple) drafts
My first drafts of Caroline’s Lighthouse and Jordan’s Sister were written in pencil on wide-ruled notebook paper, along with the stories of my other leading ladies except for Kincaid. I had the idea for her as a teen, but she only existed in my head and on a small scrap of paper until I began the first draft of her story in 2017 during the editing process for Jordan’s Sister.
In the past, I always wrote in order, but with Jordan’s Sister, I wrote the middle and end before I wrote the beginning. It’s just how the updated story came to me.
Learn more about what went into my novels.
Step 4: I edited the drafts
This part was even more important than writing the draft. I went through the manuscript for the first time on my own to find plot holes and mistakes I made while writing at midnight after my husband and children were asleep.
Step 5: I shared the draft with beta readers
Having beta readers is extremely important. I had a few of them to read for different things: the grammar-police friend, the critical one, the one who can find plot holes, and the one who questions everything. They are each valuable in their own unique ways. They helped make me a better writer.
Step 6: I made changes to develop the final manuscript
Based on the beta readers ‘ feedback, I made the changes I agreed with and reworked some things to better express the meaning I was going for. Ultimately, it was my story, so I got the final say in what happened with the story and my characters..
Step 7: I proofread the final manuscript three (or more) times
I proofed my manuscript at least three times in addition to using the software in Microsoft Word and my Grammarly premium subscription.
The best way for me to find errors was to read things aloud or have the computer read it to me. It helped catch things that didn’t flow well and forced me to slow my reading speed so that I wouldn’t be able to skip over as many errors.
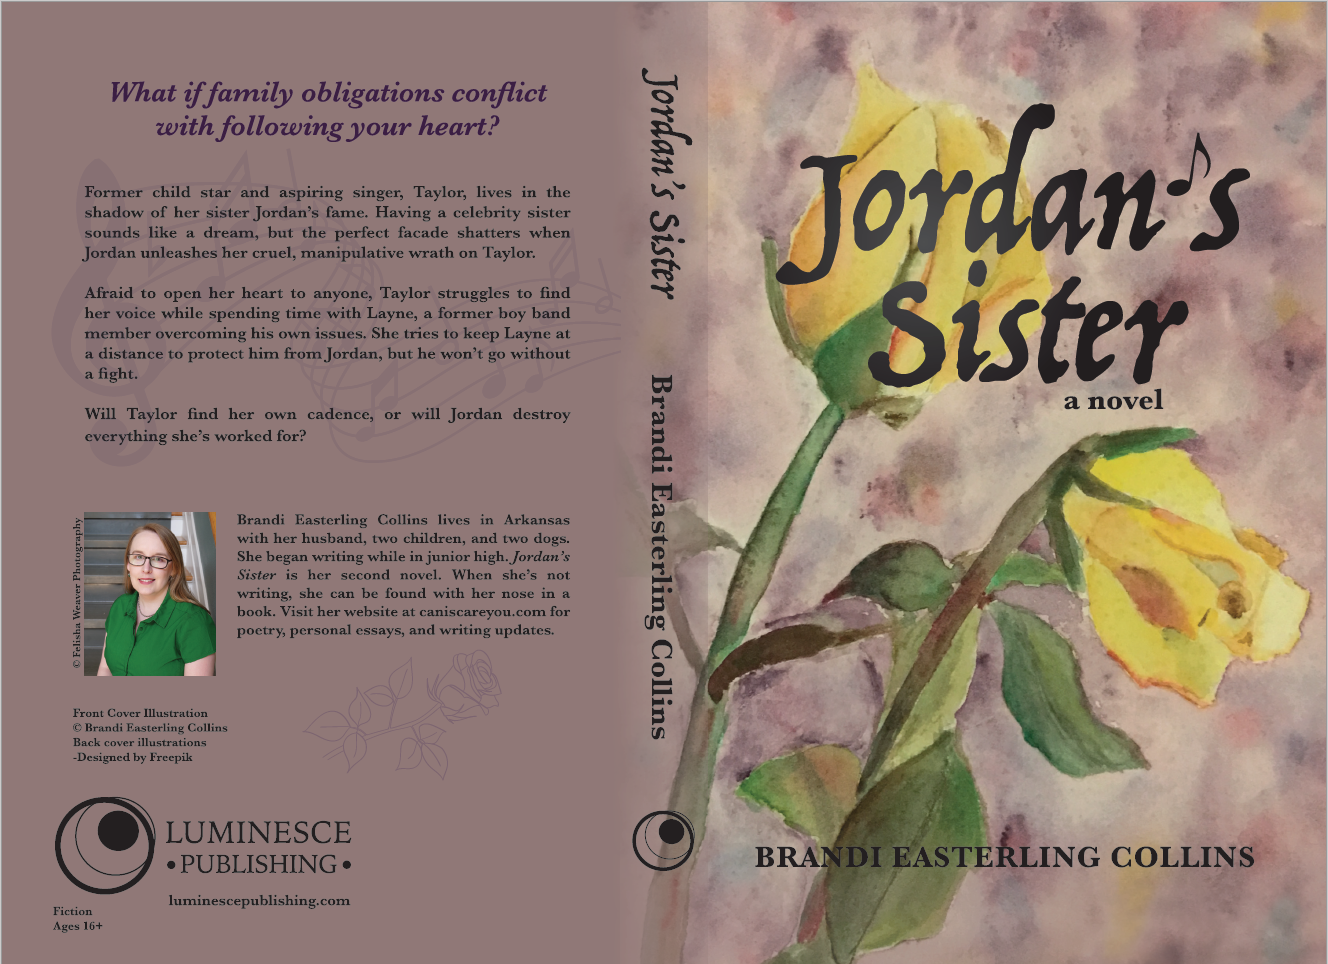
Step 8: I wrote a blurb for my book
Let me preface this section with sharing that I’ve had two root canals.
For me, getting my root canals was easier than writing blurbs for my first two novels. I had flashbacks of junior high book reports during the many drafts of my blurbs before I finally got them right with the help of my beta readers.
Now, in 2024, with five published novels under my belt, blurb writing has gotten easier. I tried to come up with something to pique a reader’s interest enough to give the book a chance.
Step 9: I finalized my publication goal
I thought about my ultimate goal and decided that self-publishing under my own imprint was my heart’s desire.
Step 10: I weighed my options
For self-publishing, there are so many options. I started with Archway Publishing, which was an expensive option I used while learning the ropes with Caroline’s Lighthouse. I later republished under my own imprint when I moved to CreateSpace now KDP (Kindle Direct Publishing) to offer both paperback and Kindle books. I’m happy with the service.
Step 11: I published
After so much prep work, I launched my novels. I typically chose dates of significance rather than follow the traditional publishing norm of releasing books on Tuesdays.
Step 12: I reflected on what success means
I had already achieved a goal by finishing and publishing a novel, so I was proud of myself. Now, will any of these novels be a success? As far as I’m concerned, they already are. I may never be a household name outside my own home, but reading a handful of loyal readers who love my stories is truly an amazing feeling.
Now, would I love to have hundreds or even thousands of readers? Of course, but if I don’t ever reach that level, that doesn’t make me a failure. I have already defined success for me as putting out books I’m proud of.
Thanks for reading,
-Brandi Easterling Collins
(Originally published April 7, 2019, and updated Decemmber 22, 2024)


